How To Change a Badge on your Car
Likely to be one of the first things that any car enthusiast considers changing on their vehicle, the customization of badging is something that, if done right, can make a big difference in vehicle appearance. Whether it’s de-badging, blacking out, or otherwise (except for up-badging, we’re looking at you ///M logo abusers), there are plenty of ways to customize your cars badges. Today, we’re focusing on removing and replacing a badge, something commonly done when you’re looking to change from chrome to black.
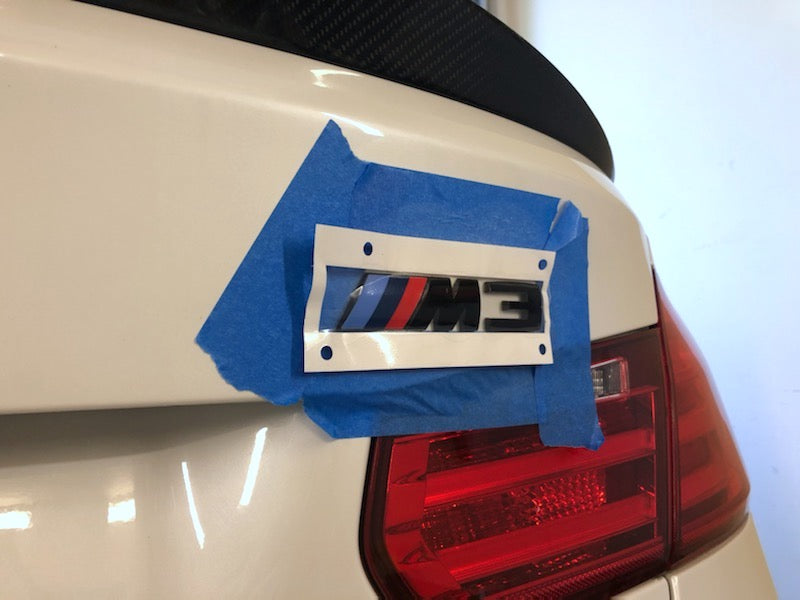
When you’re replacing a badge, positioning is everything. You want to make sure that your new badge goes in the exact same spot that the factory one came off. Failure to get this right might cause the replacement badge to be uneven, have poor letter spacing, and simply look bad.
Before you get started, get some waterless wash and wipe down the area around the badge so it’s clean and you minimize any possible scratching or marring of the paint. Once done, we need to take some 3M Painters Tape and make our outline. If the replacement badge you’ve purchased comes in a template, meaning that you apply it in one piece, then just outline the outside of the entire badge. If you’re replacing individual letters, make guidelines on the top and bottom of the badge, and then in between each letter.

With your stencil in place, you can now start removing the existing badge. There are multiple acceptable methods for this, but I’m going to share the one that works in most all cases. To help soften the adhesive, you can heat the badge carefully with a hair dryer or heat gun. If you’re using the latter, make sure not to get too close to the paint. Now, all you need to do is get some fishing line or strong dental floss to “cut” the badge away from the adhesive. Place the line behind the badge at the top, and move downwards while “cutting” left and right. The lettering should pop right off, and now you’ll be left with adhesive.

At this point, some of the adhesive will come off with the badge, and you’ll be left with some on your paint. Before moving on, take your microfiber and waterless wash again and give the area a wipe, as sand and grit can sometimes get stuck behind badges, and we don’t want to rub any of that into the paint while removing the leftover adhesive. Like the last step, there are multiple methods to handle this. The less aggressive, more commonly available way would be to apply some Goo-Gone or Rapid Remover to the glue, let it soften up, and then use a microfiber to remove the leftover adhesive. If you’re looking for a quicker method, you can purchase an Eraser Wheel, attach it to a drill, and have at it. The adhesive will be gone in a matter of moments.
Once all of the adhesive is removed, you’re almost ready to apply the new badge. Before you do this, you’ll want to wipe down the area with IPA (Isopropyl Alcohol) to remove anything left on the surface to ensure a good bond when you lay down the new badge. If you want to take it a step further, you can get some polish and quickly polish the area. Don’t forget to IPA wipe again if you do polish. Once the surface is bare, you can take your new badge, remove the protective backing for the adhesive, and place it using your tape guidelines. Once done, remove the tape guidelines, step back, and enjoy your perfectly positioned new badge!